








For macOS
Export your Mac and iCloud contacts to CSV, Excel, Outlook, and other formats. Complete privacy, no subscription.

How to Create a Contacts CSV for Email Marketing
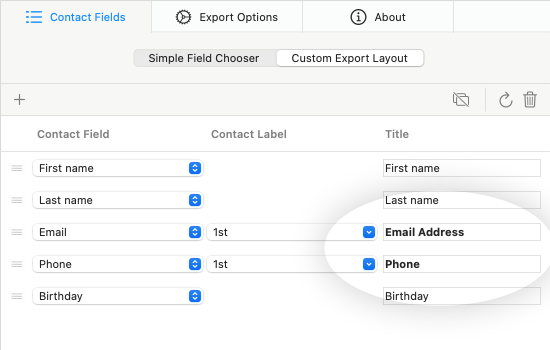
This example shows how to build an Exporter for Contacts 2 export setup for a CSV file with five columns: first name, last name, email address, phone number and birthday. It also shows how to give the columns their own titles.
Hint: Many email marketing services provide sample CSV files on their support pages that show the required structure.
1. Create a new Export Setup
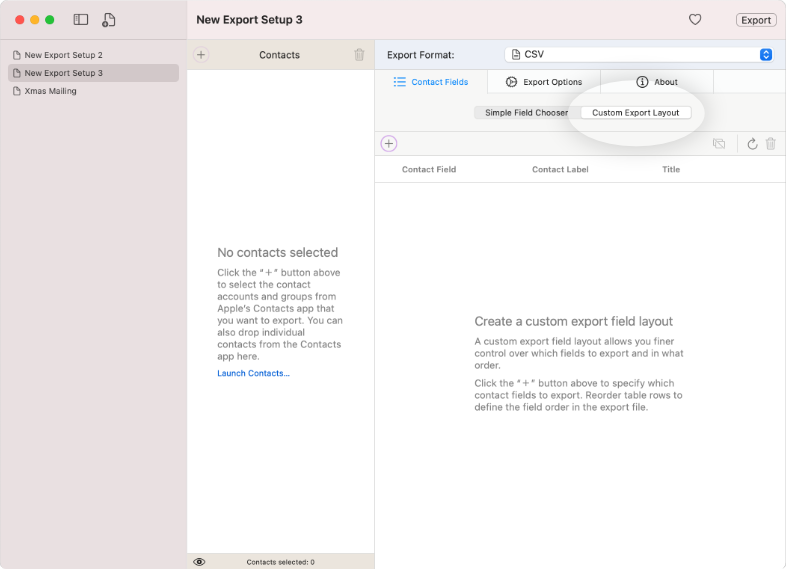
Create a new Export Setup (Menubar > File > New Export Setup...) and select CSV as the export format. Since we want to create a special format, switch to the Custom Export Layout Editor in the Contact Fields area.
2. Specify the contacts to export
Now specify which contacts you want to export. Click the [+] button in the Contacts Chooser’s toolbar and select the desired contacts from the popup menu. The menu lists all contact accounts and groups that have been set up in Apple's Contacts app. If you want to export individual contacts, open Apple's Contacts app and drag the appropriate contacts into the list. You can add as many accounts, groups and individual contacts as you want.
Note: The contacts you want to export must exist in Apple's Contacts app. If necessary, import external vCards into Apple's Contacts app first.
3. Add five contact fields
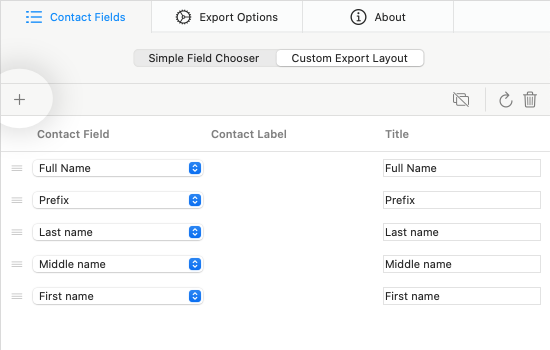
We want to create a CSV file with five columns. So just click five times on the [+] button in the Custom Export Layout Editor toolbar. This adds five rows to the table, where each table row contains a contact field and represents the corresponding column in the CSV file. When clicked repeatedly, contact fields are first added in a default order. In the next step we will adjust the selection of contact fields.
4. Adjust the contact field selection
In the Contact Field column, click the pop-up menu for each row and select the desired contact field. So set in ...
- Row 1: Full Name to First name
- Row 2: Prefix to Last name
- Row 3: Last name to Email
- Row 4: Middle name to Phone
- Row 5: First name to Birthday
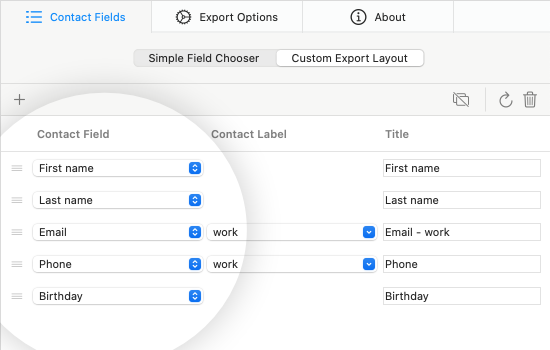
5. Adjust the contact field labels
One thing is still missing. Email and Phone are multi-value fields, as an Apple contact can have as many email addresses, phone numbers, etc. as you want. As you already know, these fields are each marked with a label in Apple's Contacts app. In the Contact Label column, the work label is selected by default. Export now and you get a clean CSV file, but the Email and Phone columns stay empty for many contacts. Those contacts have no work email or phone number, because at some point you used home, other or a label of your own. So what now?
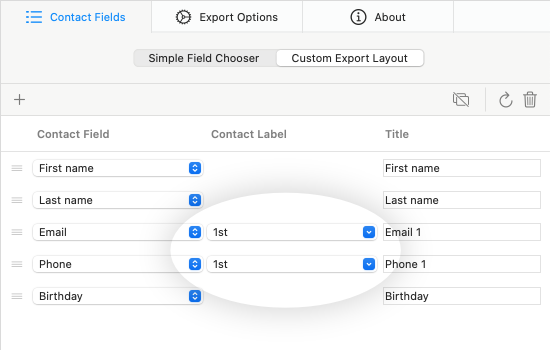
Tell Exporter for Contacts to take the first, second and so on email of a contact, regardless of the label. So in the Contact Label column, change the label from work to 1st. Do the same for the phone number.
6. Customize the column titles
Now export the CSV file and upload it to your email marketing service. All columns are filled properly, but the import tool complains: it has loaded the CSV file and cannot find the column with the email addresses. What is going on here? You have opened the CSV file with a text editor and you see that all email addresses are there. So what is this?
In the exported CSV file the column with the emails is called “Email 1”. Apparently the email marketing service does not know how to handle this. Fortunately, Exporter for Contacts can meet these requirements, as you can customize the column titles for export.
To do this, click the text field in the Title column next to the email. Here you need a bit of sensitivity. Just click the text and after a short delay the field changes to edit mode. Now change the title to “Email Address” and confirm with the Enter key. Change the title of the phone number to “Phone”.
Note: Exporter for Contacts displays customized column titles in bold.
Done
Yeah, you made it. It took some work, but the next time when you want to export, you don't have to do anything. The export setup remembers everything, and one click of the “Export” button is all it takes.